Bob Dron
Fairing Mod

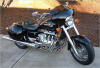
The
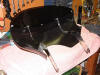
Bob Dron fairing is a sleek little fairing with a short
windshield designed for the Harley Road King. It will however fit on a
standard Valk with very minimal Modification and the use of a Memphis Shades
windshield mounting kit, and it looks great. Just a heads up though... the
fairing comes in black gel coat and needs to be primed and painted.
(Note: this article is based on using a standard model Valkyrie with no
accessory light bars, etc. If you have a light bar or other front mounted
accessories please assess and adjust to your individual situation before
doing this mod.)
Parts and tools you will need:
-
(1)
Bob Dron fairing kit (Most any MC parts dealer can order it)
Part# DS-380336
-
(1)
Memphis Fats windshield mounting kit for Valkyrie
Part# MEM9919
-
1/2" sharp metal cutting drill bit
-
English allen wrenches
-
Metric allen wrenches
-
7/16" box wrench or socket
-
Saws-all w/metal blade or hacksaw with fresh blade
-
Electrical or masking tape (to mark where to cut)
The procedure is as follows:
-
All
of these steps should be done BEFORE painting to make sure you don't
scratch your paint job while adjusting everything.
-
Using a metric allen wrench, remove the turn signals from the forks, and
let them hang down behind the forks (a towel on the front fender for
protection is a real good idea).
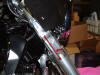
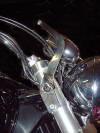
-
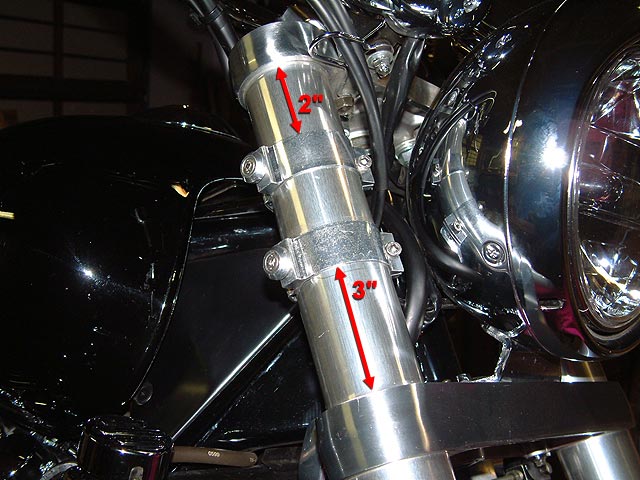
Using the fork mount rings from the Memphis Shades kit (see photos at
right) mount one ring 2" down from the top triple clamp and the other 3"
up from the bottom triple clamp on each fork. Make sure the quick
disconnect bolts are facing out. These distances are set so that your turn
signals with be high enough to clear the radiator cap when turning the
bars full right.
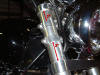
-
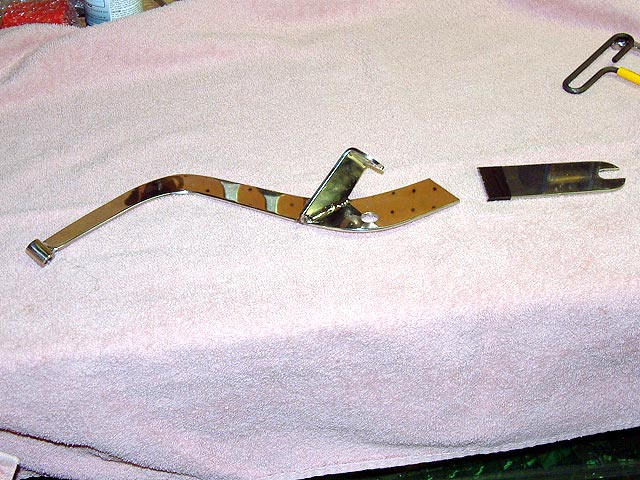
In
the photo at right you can see the assembled fairing on my workbench and
in another photo you see the unit held up against the forks. Obviously the
stock brackets are way too long.
-
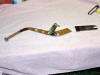
We
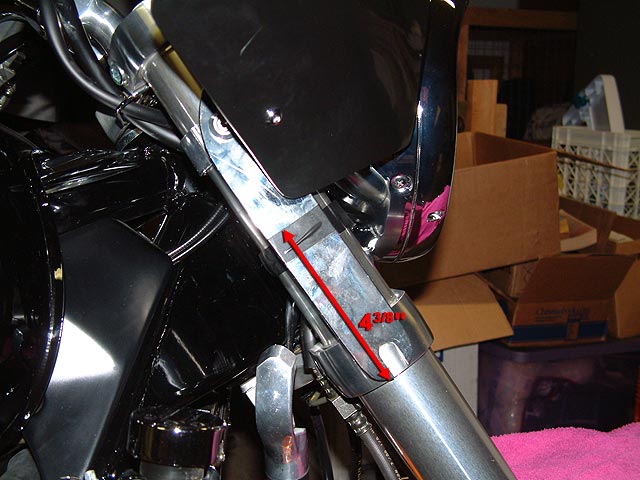
need to cut down the brackets so they will fit the forks and allow the use
of the stock turns signals. Using the Saws-all or hacksaw, cut 4 3/8" off
of the bottom of each bracket. I used electrical tape to mark where to cut
since nothing really marks well on the stainless steel brackets.(Note:
these brackets are as hard as Chinese math, so be sure you have a SHARP
metal cutting blade!)
-
Next file the burs off the ends and make the corners nice and smooth
-
Now
each bracket will have only one fork mounting hole in it. You need to add
another hole and also drill out the existing hole to 1/2"
-
The
new bottom hole needs to have it's center drilled 1/2" up from the bottom
of the bracket, and 3/4" in from the edge of the bracket. De-bur the holes
and your ready to assemble the fairing.
-
Just follow the instructions that come with the fairing to put the
windshield on and attach the brackets.
-
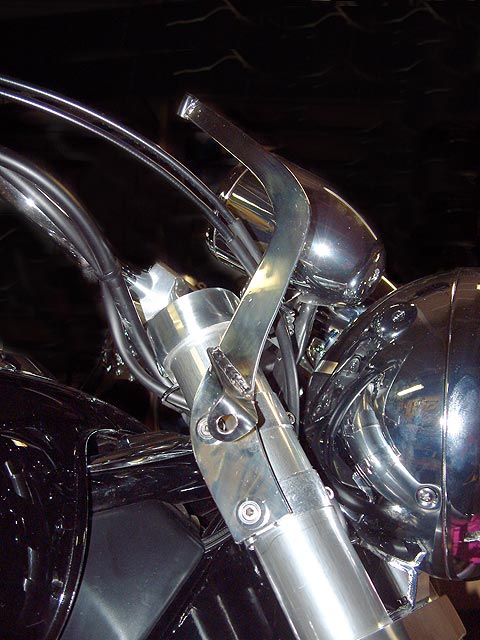
Now
mount the fairing to the forks by first removing the 4 quick disconnect
bolts on the fork mounted brackets, then line up the holes on the fairing
brackets and replace the 4 bolts. If the holes are slightly off, you can
adjust the brackets on the forks to line them up.
-
Now
replace the turn signals and mount them up against the underside of the
bottom fork bracket. You will have in effect, lowered the turns signals a
bit but kept them high enough not to smack the radiator cap. Now you're
ready for a test drive.
Now
you just need to take the fairing back off and get it painted. I was amazed
at how rock solid the fairing is once mounted on the bike. Dragbars told me
his was steady at 162 MPH at Bonneville so I don't think I'll have any
problem with mine!
 ShopTalk