ShopTalk
|
Because these pages may move to other servers
from time to time, we have put this information on our server for all to view.
If you are the original author, and you have a problem with that,
please contact us and we will remove this page.
Please checkout the "Original Authors" web
page. |
Installing
Interstate Radiator Pods on a Standard
[click on
any image for a larger view]
Overview
and opinions
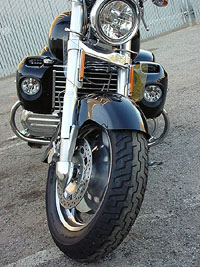
The Interstate radiator pods are apparently
controversial as far as appearance. The purpose of the pods is to
control airflow -- hot air coming from the radiator and wind coming from
underneath the tank and up into your face is diverted around the rider.
I chose to install them for several reasons. First, everyone seems to
agree that they work. I live in the Los Angeles area, and riding
a Valk across a summer desert (or even across the San Fernando valley) is
downright unpleasant. Second, the Hondaline Interstate fog lights are
way cool. Third, the pods are an ideal place to install gauges.
Fourth, while it won't help you at a stoplight, the pods appear to create a
slight ram air effect across the radiator core -- not only from the extensions
scooping the side air in, but also potentially from the directional airflow
behind the core. Since Honda cheated up out of a temperature gauge, I
guess I'll never know for sure.
Finally, I like the way they look --
especially with the fog lights. They seem to add some much-needed visual
"weight" to the front of the bike. The front 3/4 view of the
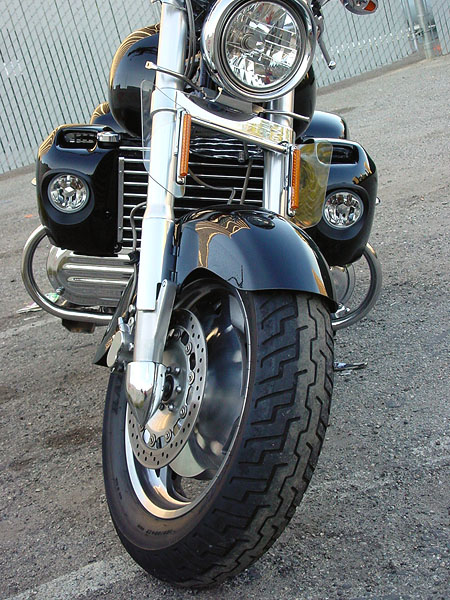
Valk highlights the abrupt transition from the wide engine area (and my
visually weighty Interstate tank) to the front wheel. There is an
unsightly gap between these two areas. The extra mass provided by the
pods, at least to my eye, makes for a better visual transition.
I admit that I have some misgivings about
their appearance. They cover two of the intake runners, making the bike
look like a four cylinder. The textured plastic panels facing the rider
are cheesy. The seams are unattractive. While I can do nothing
about the first issue, the last two, as will be described below, can be
solved.
Function
The Interstate uses a larger plastic sheet
behind the radiator. It funnels hot radiator air through the pods, which
in turn release the heat to the sides, well out of the rider's airstream.
Additionally, the pods have a fresh air inlet that can be used to direct cool
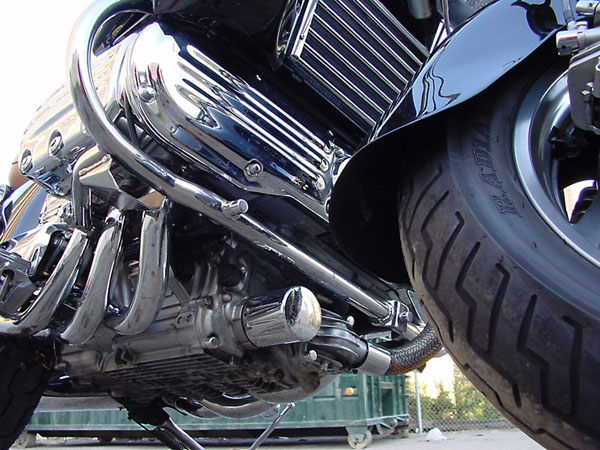
air onto the rider's legs. Finally, the Interstate engine guards (shown
below) have air scoops to direct cool air up over your feet.

Parts
Needed
To make the swap, several parts are needed
(numbers are referenced to the exploded diagrams below):
(1) The pods themselves (a gazillion little
parts);
(2) Interstate crash bars (not shown; the
pods connect to tabs welded onto the crash bars);
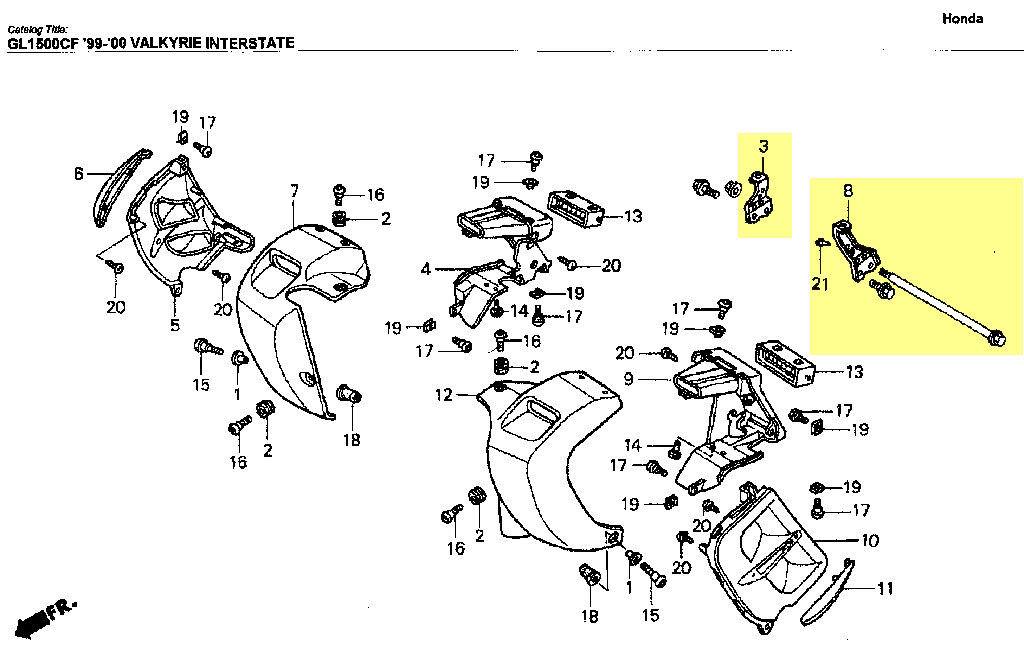
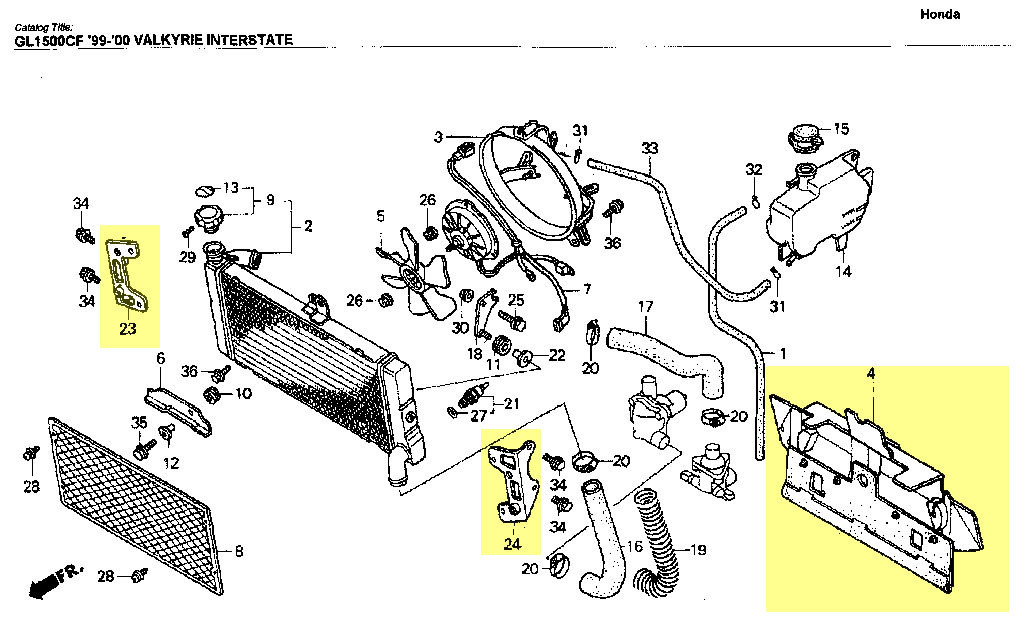
(3) The Interstate radiator shield (#4);
(4) left and right radiator brackets (#'s
23, 24);
(5) left and right frame brackets (#'s 3,8);
and
(6) a longer "buzz bolt" (#9)
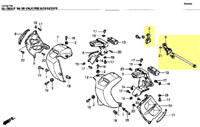
[click on
any image for a larger view]
Since the cost of new parts will exceed
$1,000, you will want to get as much of this stuff as you can from a
junkyard. I bought the pods and crash bars used for $225. The
remaining parts were about $125. Also note that the KuryAkyn intake
valance covers will not fit with the pods. Fortunately, KuryAkyn makes a
set for the Interstate (order from the VRCC store).
Installation
Finally done. Total time was a
whopping 10-15 hours. Ouch.
The only hassle -- but it is a BIG one -- is
installing the radiator shield.
Step 1:
Remove the radiator and top radiator hose.
Step 2:
Remove the tank and airbox.
Step 3:
Remove the choke cable, throttle cables, and intake runners.
Step 4:
Slide the carbs back as far as they will go (you may have to remove
or loosen whatever smog stuff is still in place).
Step 5:
Remove the old radiator shield.
Step 6:
Remove the crash bars.
Step 7:
Remove the bolts ahead of the "buzz bolt" (the one with
the radiator hanging tabs).
Step 8:
Remove the "buzz bolt."
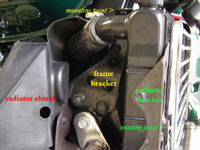
Step 9:
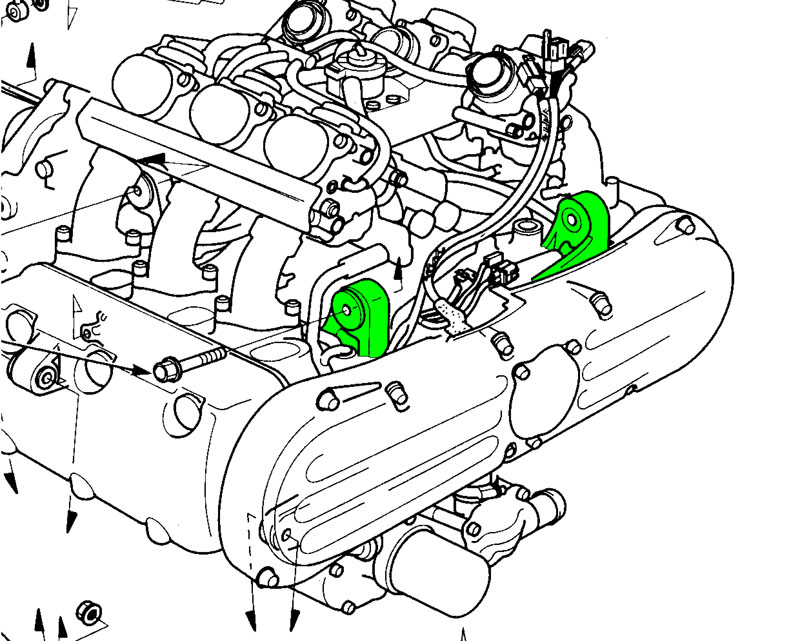
Take a break and look at the project a little more. Notice the engine
mounting bolts (green in the below diagram) and wires (temp, oil pressure,
etc.) that the rubber skirt has to go around.

Step 10:
To get the shield in, start on one side and slide it in between the carbs and
the frame. Tuck the rubber skirt up and out of the way for now.
Take your time and work the shield into place. Work the skirt around the
connector for the top radiator hose.
Step 11:
You can see that the rubber skirt has to somehow magically get between the
frame and engine. Hmmm.... First, you will see the small engine
wiring harness that needs to be addressed (crank position sensor, water temp,
etc.). Follow the wiring harness on the brake side of the engine up to
the steering head. Unplug the two connectors under the right side
steering head cover (same as the radiator fan power junction). Let the
harness dangle down for now.
Step
12: This is where you thank me (the pioneers take the
arrows<g>). We are going to force the frame rails open so that we
can slide the rubber shirt between, so that it will lay flat. Remove one
of the lower mounting bolts (the green area in the above diagram). You
will probably need some kind of jack exerting gentle upward pressure on the
engine. Drive the bolt out with a hammer and drift if required.
Take the old buzz bolt and feed it through
its hole. Don't push it all the way through the other side of the
frame. Take an appropriately sized nut and thread it down and far as it
will go. Now push the buzz bolt through the other side of the
frame. Take some big Vise Grip pliers and clamp the bolt on the other
side (as tight as you can). Now tighten the nut as far as it will
go. The frame rail should now be open enough to allow you to slip the
rubber skirt in between.
[photos coming soon]
Replace the mounting bolt (once again, some
force is required). Repeat for the other side. Feed the engine
wire harnesses through and reattach. Voila!
[photos coming soon]
Step
13: Replace all of that stuff you have lying all over
the floor (except you will, of course, use the Interstate crash bars, longer
buzz bolt, and frame and radiator mounting brackets).
You should also take the opportunity to
solve the "buzz bolt" problem. For those unaware, the
"buzz bolt" got its name because of the annoying vibrations this
bolt exhibits in mid RPMs. The bolt/sleeve combination resonates.
While the traditional solution has been to torque the hell out of it, many
have reported success with damping the resonance between the bolt and the
sleeve. The first solution is to fill the sleeve with silicone.
The second solution -- the one I used -- was to drill and tap the sleeve to
accept set screws. I used two 8-32 set screws, each placed roughly 1/3
from the end. Don't forget the Loctite.
[photos coming soon]
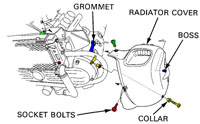
Fortunately, the actual pod installation is
straightforward. The pods themselves are installed by locating a pin on
the rear of the pod (marked "boss" in the below graphic) with a
grommet on the crash bars. The pod then swings around and bolts onto the
radiator brackets, frame brackets, and the crash bar.
[click
on any image for a larger view]
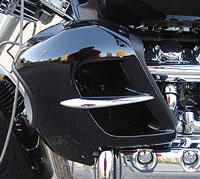
Modifications
Seam Filling: The
ABS plastic on the pods leaves much to be desired -- the seams are
nasty, the edges of the plastic are rough, and in general do not match the
quality of the rest of the bike. I glued the inner and outer panels
together with epoxy. You might also try J-B
Weld or equivalent. I used enough to where excess glue squeezed up
from the seams to minimize the need for Bondo
or other filler.
Rough sand the seams smooth.
[Optional - for the obsessed only]
Next, I used fine fiberglass cloth (available at hobby stores for model
airplane building) and laid a patch over the seam to prevent the crack from
showing through later. This layer also needs to be sanded smooth enough
for filling.
This layer, of course, needs to be sanded
and filled. Now it's time to break out the Bondo.
Run a thin coat across the entire seam and sand flush. Don't try to use
a sander for this step -- any pro will tell you that hand sanding with a block
produces a superior finish.
I also sanded the edges and other rough
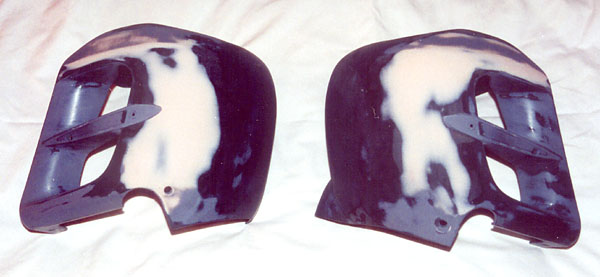
spots. One handy trick - when you think you are done sanding, spray a
light coat of contrasting paint on the pods. Then hand sand the entire
surface, trying to make the new color disappear. Where the new color
remains, there is a low spot that needs to be filled. The image on the
left below shows the pods almost ready to paint. Compare with the image
on the right. With a little help from a great painter, I impressed
myself.

After prep, it's time to go to the painter
(if you are going to install the fog lamps, now is the time to do it).
There are five nasty-looking buttonhead allens on each pod - three to secure
the pods to the crash bars, radiator, and frame brackets; and two to secure
the faces onto the pods. I had these painted black.
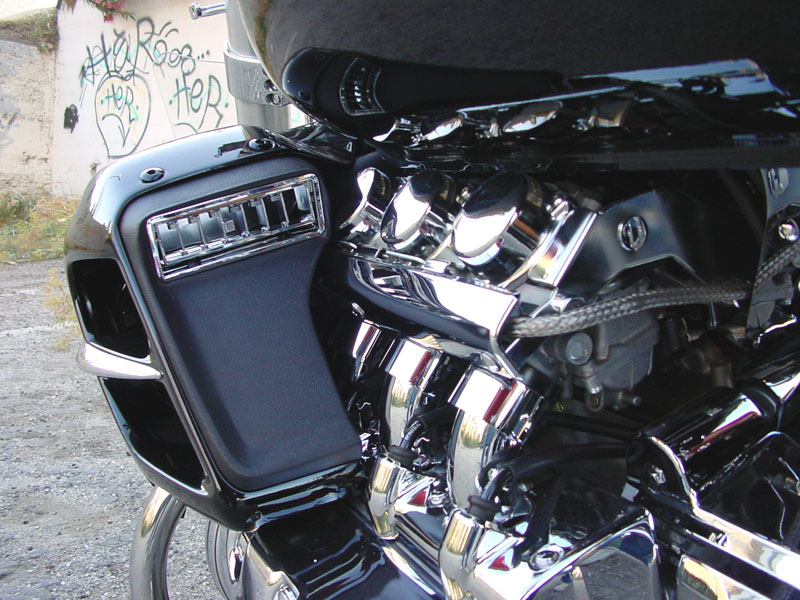
Fog/Driving
lights: The Hondaline
Fog Light kit is a little pricey, but incredibly well made. The
light housings must be a pound each -- talk about overengineering. The
lights do not mount to the pods, but instead bolt securely to the crash
bars. Once installed, you couldn't move them with a crane. The
lamps themselves are also very well engineered, with a very attractive
reflector and jewel-cut lens. Those looking for half-mile visibility
will be disappointed -- the beam is wide and diffuse. This suits my
needs just fine; as a city dweller, I am primarily looking to be seen and the
large lenses do the job with high style!
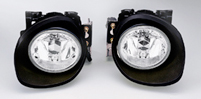

Several people have reported that is a
nightmare to install. Although it was intimidating to cut the pods, the
rest of the installation is easy. Since I already had a wiring harness
in place, that cut a couple of hours off of the install.
Gauges:
As mentioned above, the pods make an ideal place to install gauges.
There is no other good place to install gauges on a Valk. Plus, the
wires can be short and hidden. I am installing an air/fuel meter and a
fuel gauge (provided I can find a gauge compatible with the resistance of the
sender).
Face covering: The
textured plastic finish looks too cheap and too 90's. I'm still thinking
on this one. Carbon fiber would be neat, but perhaps too difficult to do
and too 90's also. Maybe black leather would be the best bet.
Chrome vents:
JCWhitney sells some trick chrome
vents for the Goldwing. These work fine on the pods also. A
little more 60's or 70's than 50's, but they break up the monotony of the
black faces.

Special thanks to Jim Lantz (AlbqJim) for
all of his assistance in making this project work.
last
modified 05/07/2011
©
2001 Timothy Skelton - all rights reserved
ValkyrieRiders.com F6Rider
Webzine
ShopTalk
Just
Pics
Valkyrie
Hot Links