ShopTalk gears.gif (7834 bytes)

Because these pages may move to other servers from time to time, we have put this information on our server for all to view. If you are the original author, and you have a problem with that, please contact us and we will remove this page.
Please checkout the "Original Authors" web page.


Adding Engine Gauges to the Valkyrie

The biggest problem with installing a gauge set (Water temp, Oil pressure, Volt or Amp meter) is finding a decent place to mount them without it looking like an obvious add-on. The second (and this really ties with first) is finding a place to install the temp sensor without disabling the hot or idiot light. What came to mind and how this particular install was accomplished, was to install a "T" adapter in the upper radiator hose for this sensor.

Note: the ground wire in the far right picture.

Many Thanks go out to Robert Brown for machining this adapter for me. It is simply an awesome piece of work.

Installed on an Interstate. I chose to mount the gauge set on the handlebar clamp. The gauges themselves are made by Actron Mfg. Sunpro Electronic Triple Gauge Kit - CP8095. There is also a second choice of Stuart Warner analog gauges that are more compact yet.  STW-82459   4 1/8" wide x 2" high x 2" deep panel. Unfortunately they lack any built in mounting other than double-faced foam tape. Although I am sure that could be modified.

The install went in the following order:
Please see the Honda Service Manual for complete details.
 
1: Drain and remove radiator. The drain is the bolt directly under the water pump. I filtered the coolant through a coffee filter and reused.
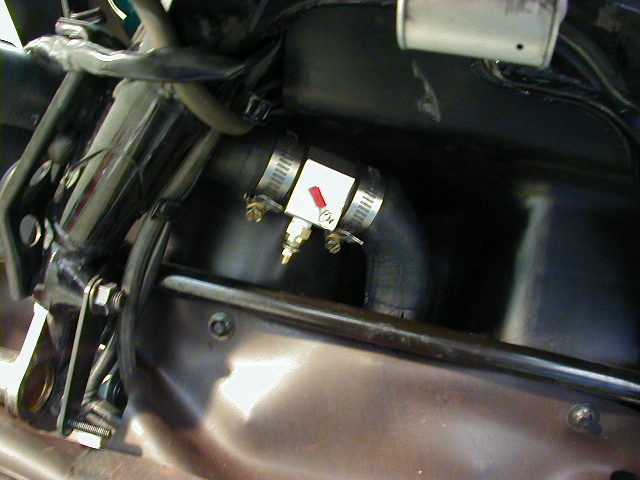
2: Remove and modify the upper radiator hose.
 
 
This is a little tricky as the radiator hose is one big compound curve and the T adapter is strait. I removed as close as possible, a length of hose equal to the adapter without modifying the curve of the hose. This necessitated removing approximately 1" less then the length needed. I then removed ½ " from each end of the hose to maintain the proper dimensions. Reinstall upper radiator hose and connect a ground wire to the T adapter.
I ran a fused 12 gauge positive and negative harness to the front of the engine area for this purpose.

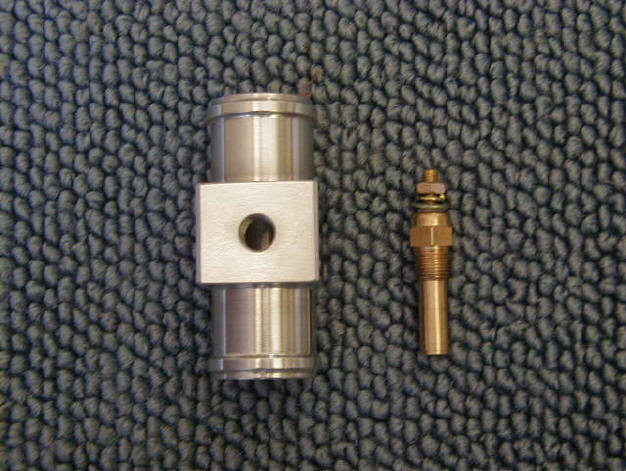
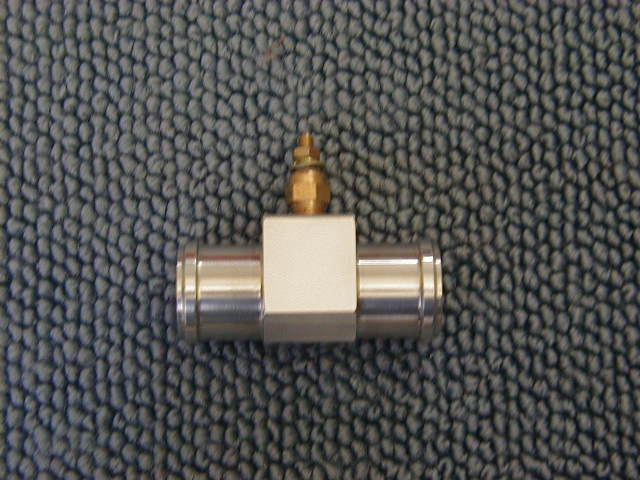
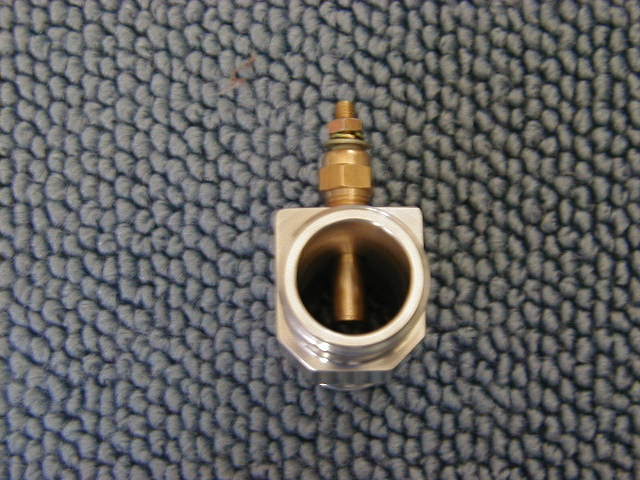
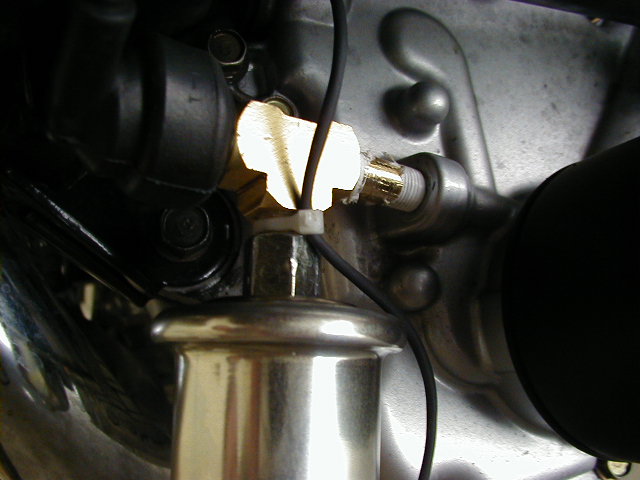
3: Install the oil pressure sender.


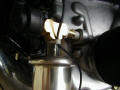
This is pretty strait forward. Simply remove the oil light sensor and using the adapters included in the kit. T the pressure sender in as pictured using teflon plumbing tape as a thread sealant. The pressure sender comes covered with some type of anodizing or coating leaving it an ugly brown/gold color. This can be removed. It polishes up quite nicely using Blue Magic Liquid Metal Polish.

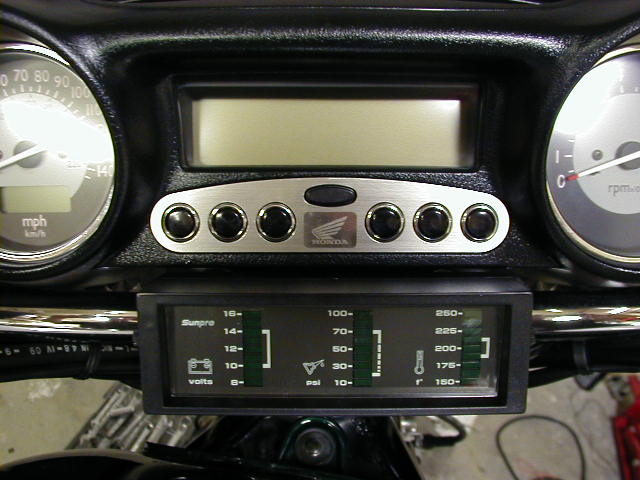
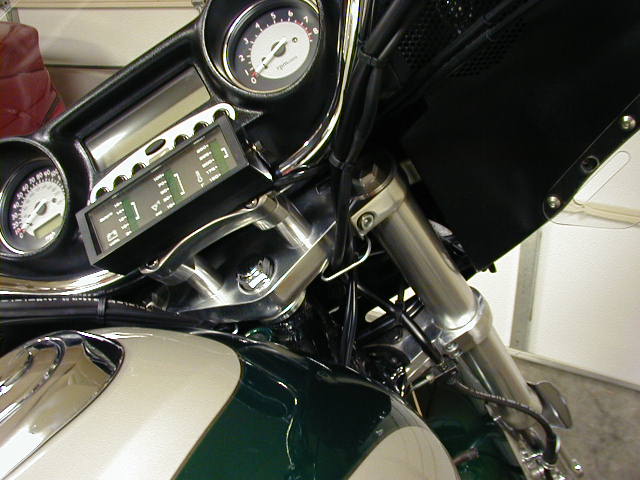
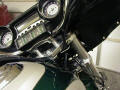
4: Wire up the gauges according to the instructions included with the kit. The volt or amp wire connects to the fused positive harness mentioned in step 2. Cover all wires with heat shrink before connection for added protection and route all wires along existing wire bundles.

5: Reinstall radiator in accordance with the service manual. Refill with silicate free coolant and leak check.


ValkyrieRiders.com   Message Board    ShopTalk    Just Pics    Valkyrie Hot Links