Electrical Connection LED Turn Signal Modification
By Dave Ritsema
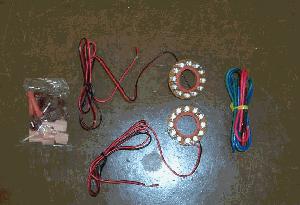
After waiting several months I finally received my kit
from
http://www.electricalconnection.com
I had seen these kits advertised months earlier but they apparently were
still in the developmental phase. The premise of the kit was to turn the
stalk mounted turn signal lights on a standard or tourer into red running
and brake lights while still maintaining their legality as amber turn
signals. In a nutshell, the way this is accomplished is by mounting a
circuit board with super bright red LED’s on top of your incandescent bulb.
When you’re in the running lamp mode, the lens appears red, when braking, an
even brighter red and when you turn, the LED’s shut off and you have amber
turn lights.
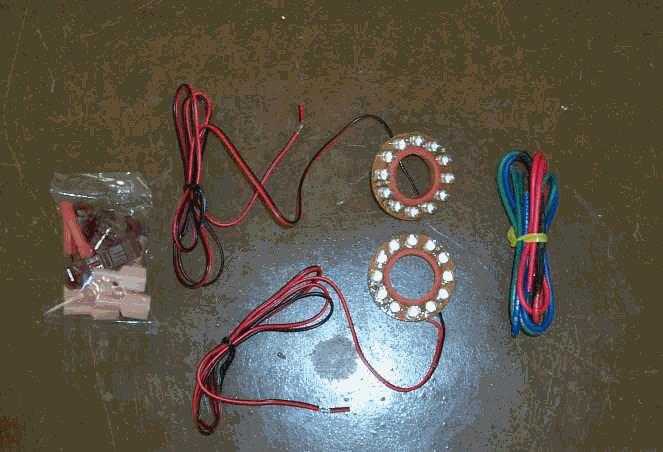
Step 1 involved removing the LED’s from the shipping
packaging. You see the two LED packs, two circuits, and a package of
electrical connectors, many of which most purists won’t use, i.e. wiretaps.
The included instructions were quite clear, with the possible exception
of how to tap into the bikes wiring. Remember that this is a universal kit,
not made special for the Valkyrie. The only part of the kit I wasn’t real
keen on was the wiretaps, or as some call them "scotch locks". I chose not to
use them, favoring a more permanent method instead (soldering).
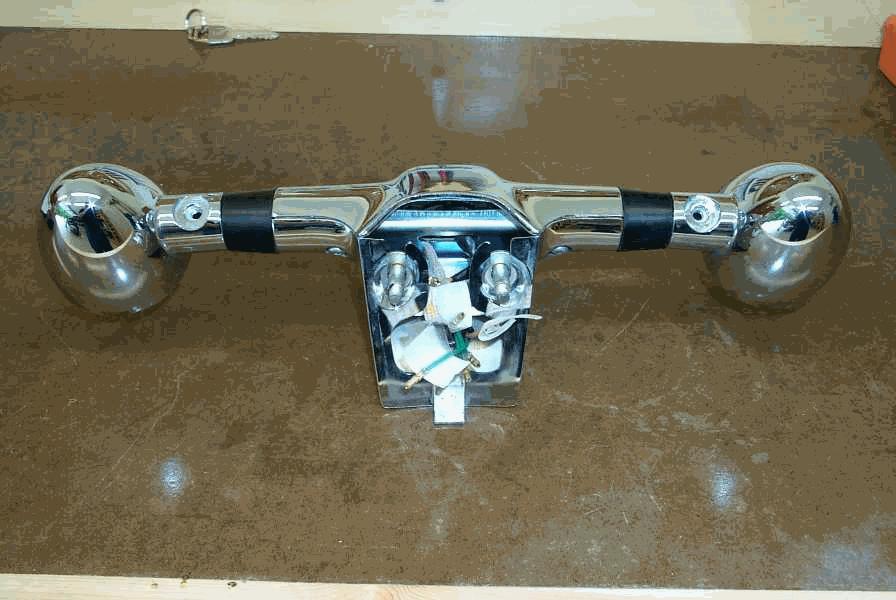
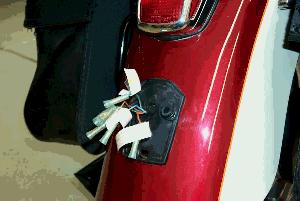
Step 2 begins with the removal of the license plate and its bracket.
This step may be unnecessary, but I found the pod easier to deal with and
less prone to scratching the rear fender when these items were removed. Next
the chrome pod is removed, by removing the two M10 bolts inside the rear
fender. After these bolts are removed pull the top away from the fender and
lift up; as a small notch in the fender with it’s corresponding small
bracket also help hold the assembly together. The wiring connections must
then be unplugged. They are all color-coded, but if you are anal like me you
mark them anyway.
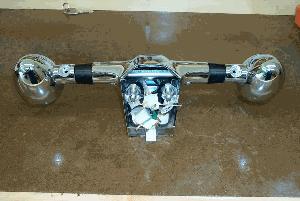
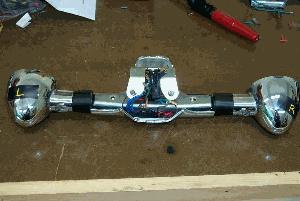
Step 3. Involves the mounting and routing of the LED’s to the housing.
First remove the two Phillips head screws holding the top and bottom halves
of the housing together. This will aid in the routing of the wires. Also
remove the screws holding the turn signal heads in place, In order that they
may be manipulated at will. Remove the bulbs, and carefully rotate the inner
reflector slightly, this will allow it to become released from the assembly.
We must drill a hole in this reflector for the LED wires to run back into
the bikes wiring harness. Using a drill, carefully drill an appropriately
sized hole in the bottom of the reflector so that the wires may pass through.
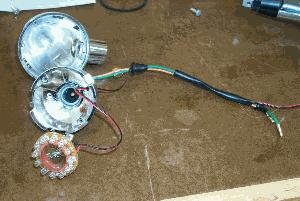
After mounting the LED’s to the bulb as per the instructions, I un-taped
the factory harness and carefully slid my wires along with the factory ones.
I also slit a small hole in the grommet and slid the wires through, ensuring a
weather tight seal. After retaping the harness ends, it looked like it came
that way from the factory. I then carefully inserted the bulb, pulled up the
slack wires and careful reinstalled them in the turn signal housing. Pull
all your wires through the same channels as the factory wiring and have them
come out in the large open area on the backside of the housing.
Step 4, OK let’s wire this sucker! The directions provided were quite
clear in this regard. However, being the anal type I was not into using
wiretaps. Instead I opted to strip away a bit of insulation, solder in my
connection and reinsulated the wire. All the Honda connectors are the bullet
types, and if I had it to do all over again I would use "bullet Y’s" that
would allow you to simply plug in to the factory wiring. (The Electrical
Connection is ordering them as we speak) Simply wire as per the
instructions, what you need to know however is what the bikes wiring color
codes are:
Left signal – ORANGE
Right signal - BLUE
Running - COFFEE BROWN
Ground – GREEN
Brake - STD GREEN/YELLOW
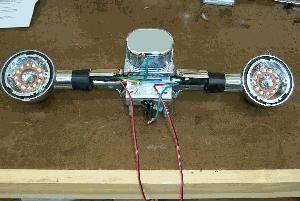
There is a wiring harness included, which I assume includes a diode pack.
I simply cut them to length and spliced them into the harness as per the
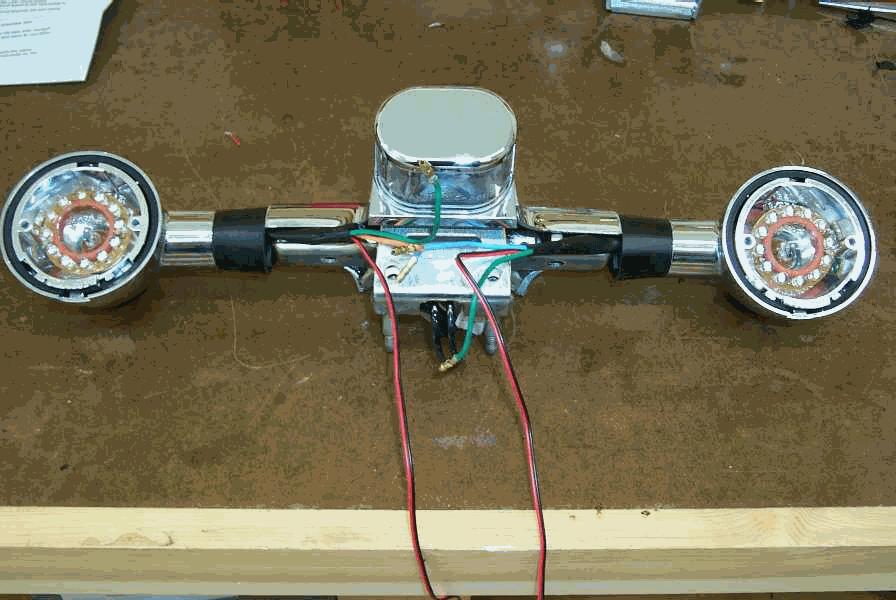
directions. Keep your wires as short as possible, as you will have to stuff
them all back inside the housing when you re mount it to the bike. After you
are done, you will have mounted and attached all the wires but one. The
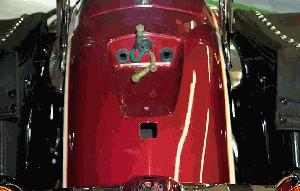
brake light must be accessed from the tail light assembly. Below is a
picture of the assembly after stuffing all the wires back inside the
housing.
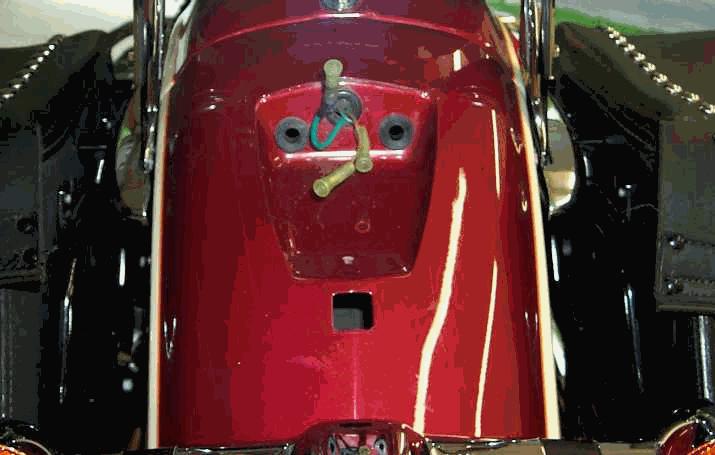
Step 5 involves running a wire down from your brake light down to the
turn signal pod. First you have to remove the red lens and gasket. Then you
must unbolt the tail light assembly from inside the rear fender. They are
small-headed sleeve type bolts. Not entirely sure, but I believe they were
M6. After removing the bolts, pull out the tail light assembly and
disconnect the bullet connectors. On the brake light wire (GREEN/YELLOW), I tapped in a 16-gage wire and ran it back through the tail light
grommet, and followed the harness down, bringing it out the lower turn
signal cut out. I attached this wire into the LED harness, making my final
connection.
Step 6 reassemble the taillight assembly to the fender. Then reassemble
the turn signal assembly to the rear fender, taking care to insure your
connectors have "snapped" into place. These wires are short, in a perfect
world someone holds on to the assembly as you push the connectors back on.
After carefully tucking the wires inside the housing push assembly into the
lower notch on the fender and raise it up into place. Re install bolts and
tighten bolts finger tight.
Step 7 turn on the ignition. If all went as planned, your turn signal
lenses should glow red. Now pull the brake lever, they should get brighter.
Finally, try the turn signals, the lens should glow amber. Pretty cool huh?
You have now effectively tripled your rear lighting. Now that you know
everything works, tighten all your tail light and turn signal pod bolts.
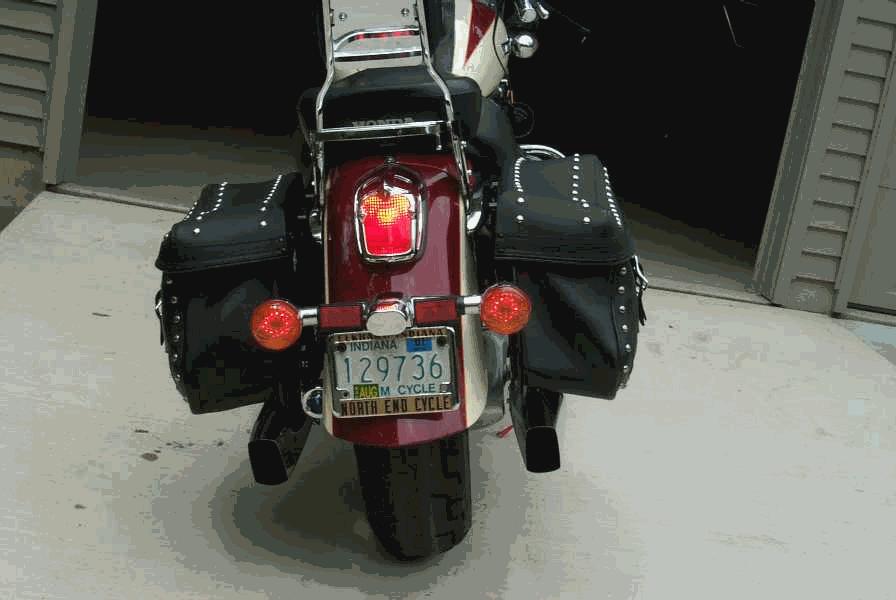
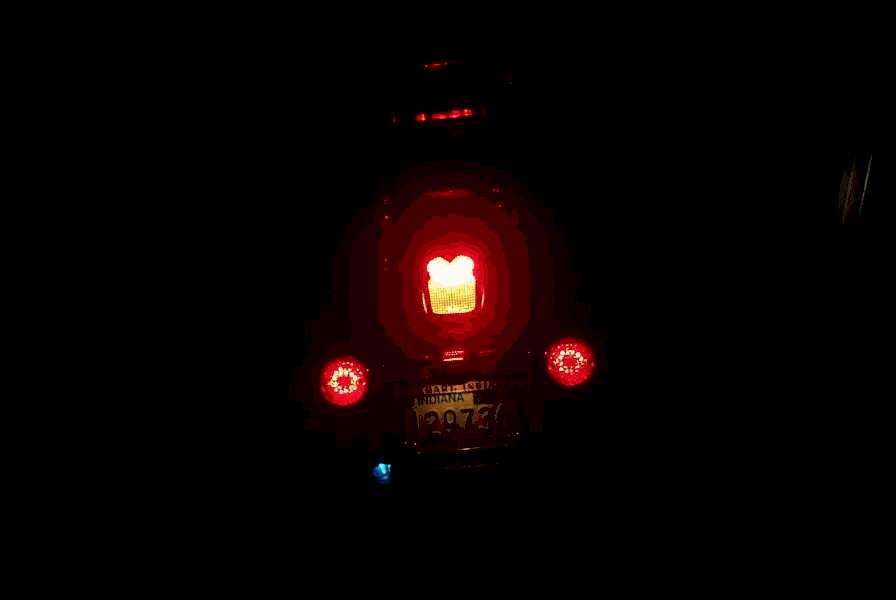
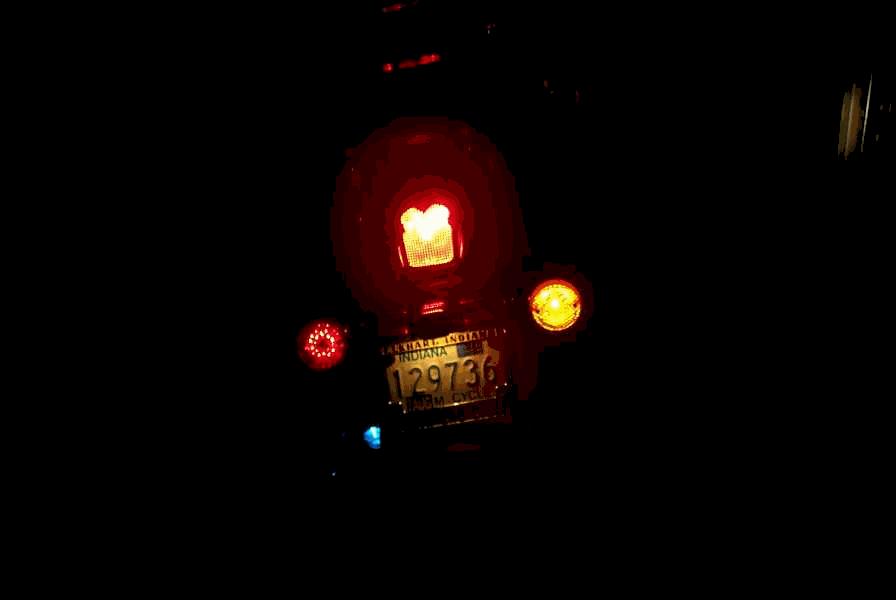
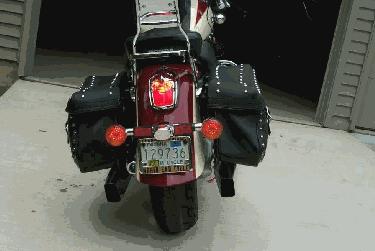
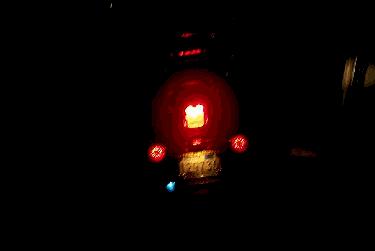
Below are a few examples of how they look in use. One small disclaimer in
regards to appearance. I am running a halogen brake light bulb that is
already MUCH brighter than stock. So if the LED’s appear dim, it is for that
reason. They actually are quite bright at night.
Day Braking
Night Braking
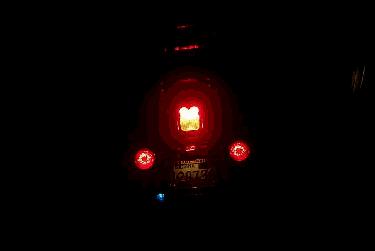
Night Running
Night Turn Signal

 ShopTalk